Preface
This post walks you through connecting the VSCode debugger to Rcpp code. It’s a practical guide, drawing from these resources:
- Using VS Code to Debug R Packages with C or C++ Code
- vscode-rcpp-demo (GitHub repo)
- R packages documentation
For reference, I’m using a MacBook Pro (M2 Pro chip) with R 4.3.1 installed via Homebrew.
Step 0: Install Required R Packages
Before diving in, make sure you have these R packages installed:
- vscDebugger : Connects R code to the VSCode debugger
- devtools : For building R packages
- usethis : Helps set up package skeletons
- testthat : For unit testing
Step 1: Set Up VSCode for C++
First, install VSCode if you haven’t already. Then, add these extensions (as recommended by Davis Vaughan):
CodeLLB is the debugger we’ll use to connect to Rcpp.
Step 2: Create an R Package
To debug C++ code with Rcpp, you’ll need to wrap your code in an R package. While it’s tempting to just use an .r and a .cpp file together, LLDB can’t easily hook into the C++ code unless it’s part of a package (see this StackOverflow post
).
Here’s a quick example of what you might try without a package:
library(Rcpp)
sourceCpp('my-rcpp-implementation.cpp')

# declare variables
...

cpp_impl(x, y, z)
Unfortunately, LLDB won’t attach to the C++ code in this setup, so packaging is necessary.
You can create a package by:
- Cloning the demo repo above
- Using RStudio (File → New Project → New Directory → R Package with Rcpp)
- Running
usethis::create_package()in R
Once your package is set up, move your files:
- R files →
R/directory - C++ files →
src/directory
Step 3: Configure C++ in VSCode
We will now connect the VSCode debugger so that we can debug the Rcpp code. Depending on your operating system and R installation this step will not be exactly the same, so don’t copy-paste blindly—adapt paths and settings as needed.
Open the command palette (Cmd+Shift+P), type “edit configurations,” and select the C++ configuration. You might see a UI dropdown like this:

If you choose JSON, you’ll get:
Now, let’s help VSCode find the R and Rcpp header files. Open the command palette (Cmd+Shift+P), type “edit configurations,” and select the C++ configuration (choose JSON if prompted). You’ll see something like:
{
    "configurations": [
        {
            "name": "Mac",
            "defines": [],
            "macFrameworkPath": [
                "/Library/Developer/CommandLineTools/SDKs/MacOSX.sdk/System/Library/Frameworks"
            ],
            "compilerPath": "/usr/bin/clang",
            "cStandard": "c17",
            "cppStandard": "c++17",
            "intelliSenseMode": "macos-clang-arm64"
        }
    ],
    "version": 4
}
In the innermost object we will add the include paths for the R/Rcpp header files:
{
    ...
    "includePath": [
        "${workspaceFolder}/**",
        "/opt/homebrew/lib/R/4.3/site-library/Rcpp/include/*",
        "/opt/homebrew/lib/R/include/*"
    ]
    ...
}
Your paths may differ—find them by running these in R:
R.home("include") # Directory with R.h
.libPaths() # Find Rcpp directory
If you run into compilation issues, create a Makevars file in src/ with:
PKG_CPPFLAGS = -I/opt/homebrew/lib/R/4.3/site-library/Rcpp/include
Adjust the path as needed for your setup.
Step 4: Export Rcpp Functions (NAMESPACE)
The NAMESPACE file at your package root controls what gets exported. Getting this right is key for debugging.
Manual method:
Add these lines to NAMESPACE (replace pkgname with your package name):
useDynLib(pkgname, .registration=TRUE)
importFrom(Rcpp, evalCpp)
exportPattern("^[[:alpha:]]+")
Recommended: Use roxygen2
- In your C++ files (in
src/), annotate exported functions:
//' @export
// [[Rcpp::export]]
For example:
#include <Rcpp.h>
#include <random>
using namespace Rcpp;

//' @export
// [[Rcpp::export]]
NumericVector f_dens_cpp_1(const NumericVector& y,
                             const NumericVector& x,
                             const NumericVector& z){
  NumericVector ret(y.length());
  for (int i = 0; i < y.length(); i++){
    double ans = 1;
    for (int j = 0; j < x.length(); j++){
      ans *= exp(y[i] * z[j] * x[j] - exp(y[i]*x[j]));
    }
    ret[i] = ans;
  }
  return ret;
}
- Run this in your package root to generate Rcpp exports:
Rcpp::compileAttributes()
- Create package documentation:
usethis::use_package_doc()
This creates a file like:
#' @keywords internal
"_PACKAGE"

## usethis namespace: start
## usethis namespace: end
NULL
- Add these lines (again, replace
pkgname):
#' @importFrom Rcpp evalCpp
#' @useDynLib pkgname, .registration=TRUE
- Finally, generate the
NAMESPACE:
devtools::document()
Step 5: Write a Unit Test for Debugging
Unit tests are invaluable for debugging. They let you run small, focused pieces of code—perfect for stepping through C++ functions.
From your package root, run:
usethis::use_testthat()
usethis::use_test('my-test')
This creates a testthat/ directory. In your test file, you can call your Rcpp functions directly:
# tests/testthat/test-my-test.R
test_that("Density works", {
  dat <- read.csv('2_Poisson.csv')
  z <- dat$z
  x <- dat$x

  step_size <- 0.01
  res <- seq(0, 1, step_size)

  # f_dens_cpp_1 is an Rcpp function
  expect_equal(f_dens_cpp_1(res, x, z), c(0, 1, 2))
})
No need to import the functions—they’re available when you run devtools::test().
Step 6: Set Up the Launch Configuration in VSCode
By now, you should have a .vscode directory in your package root. Add a launch.json file with:
// Use IntelliSense to learn about possible attributes.
// Hover to view descriptions of existing attributes.
// For more information, visit: https://go.microsoft.com/fwlink/?linkid=830387
{
    "version": "0.2.0",
    "configurations": [
        {
            "name": "(lldb) Launch",
            "type": "lldb",
            "request": "launch",
            "program": "/opt/homebrew/Cellar/r/4.3.1/lib/R/bin/exec/R",
            "args": [
              "--vanilla",
              "-e",
              "devtools::test()"
            ],
            "env": {
              "R_HOME" : "/opt/homebrew/Cellar/r/4.3.1/lib/R"
            },
            "terminal": "console",
            "stopOnEntry": false
        }
    ]
}
If you already have R debugging configs, just add this one to the list. Make sure the "program" and "R_HOME" fields match your R installation. Find your R_HOME by running R.home() in R. The R binary is usually at $R_HOME/bin/exec/R (not the script you get from which R).
Step 7: Debug Your C++ Code
Now, open your C++ file in src/ and set a breakpoint by clicking to the left of the line number:

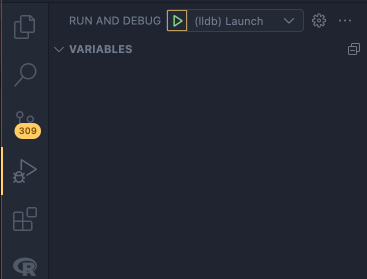
Go to the debugger tab in VSCode and click the green start button next to your launch configuration. This will start the debugging session:

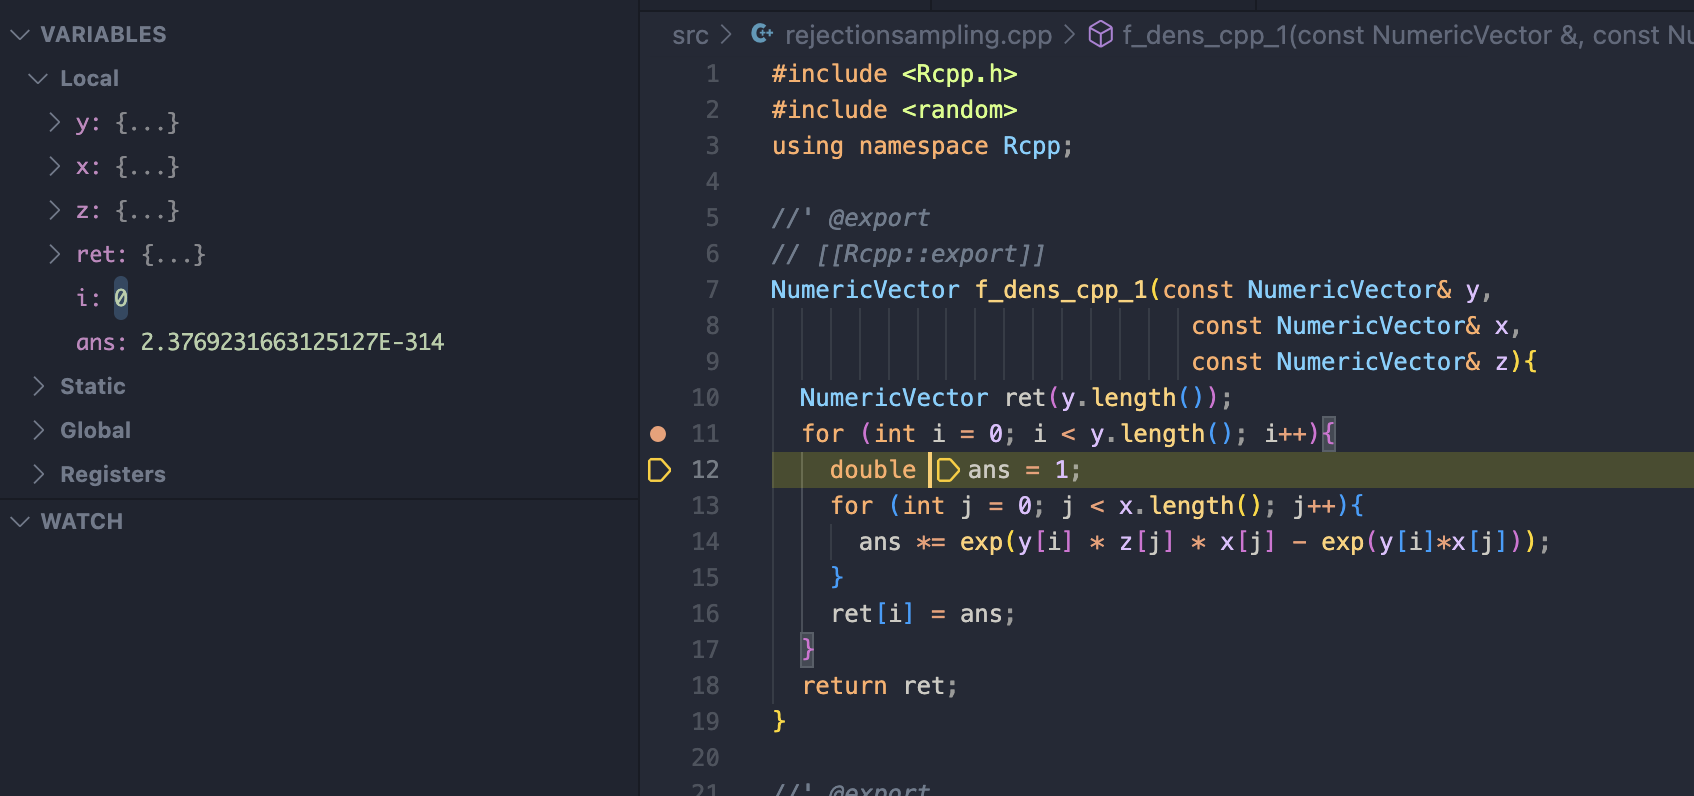
When your C++ function is called, the debugger will pause at your breakpoint, letting you inspect variables and step through the code:

You can also use the debug console to send commands directly to LLDB.
Final Remarks
That’s it! You now have a working setup for debugging Rcpp code in VSCode. If you want to avoid setting up c_cpp_properties.json for every project, you can add the include paths globally:
Open user settings as JSON (Cmd+Shift+P → “user settings”), and add:
"C_Cpp.default.includePath": [
    "/opt/homebrew/lib/R/4.3/site-library/Rcpp/include/*",
    "/opt/homebrew/lib/R/include/*"
]
This way, VSCode will always know where to find the R and Rcpp headers for any project.
 Rcpp
Rcpp